If you have already designed and developed a WordPress website on your local computer and now want to make it live, this guide will help you move your site smoothly and error-free.
Many beginners know how to design a website but are unfamiliar with domains, hosting, and live server setup. Whether your website is built using WordPress, PHP, or HTML, the biggest challenge is transferring all content, settings, and files from a localhost environment to a live domain.
This step-by-step tutorial explains the easiest way to migrate a WordPress site from localhost to a live server without technical headaches.
What You Need Before Moving WordPress to Live Server
Before making your website live, ensure you have the following:
1. Purchase a Domain Name
A domain name is your website’s address (for example, yourwebsite.com) that users will use to access your site online.
2. Buy Web Hosting
Hosting is where all your website files, database, and content are stored. After purchasing hosting, you will receive access to cPanel.
3. Connect Domain to Hosting (DNS Setup)
Update your domain’s DNS settings to point to your hosting server so your domain connects properly.
4. Install WordPress on Your Hosting
Install WordPress on your hosting account and log in to the live site using the admin username and password.
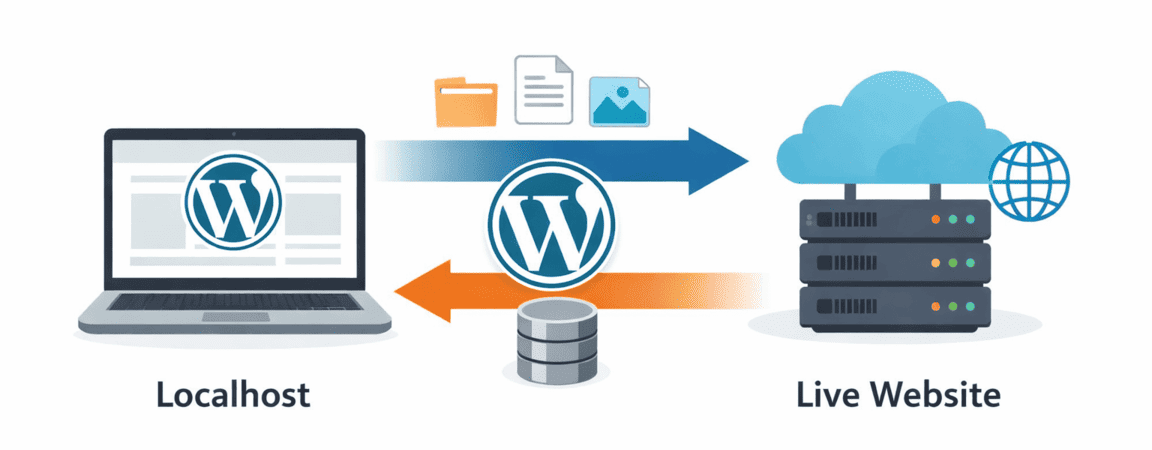
How to Move WordPress from Localhost to Live Website
The easiest and safest method is using a migration plugin.
Step 1: Install All-in-One WP Migration Plugin
- Install All-in-One WP Migration on your localhost WordPress site
- Install the same plugin on your live WordPress site
Step 2: Export WordPress Site from Localhost
- Go to All-in-One WP Migration → Export
- Choose Export to File
- Download the exported file to your computer
This file contains:
- Website content
- Themes
- Plugins
- Database
- Media files
Step 3: Import Site to Live Website
- Go to your live WordPress dashboard
- Open All-in-One WP Migration → Import
- Upload the file you downloaded
- Click Proceed and wait for the import to complete
Once finished, reload the page.
Step 4: Log In to Your Live Website
Use the same username and password you used on your localhost WordPress site. All your settings, posts, pages, and designs will now appear on the live website.
Final Checks After Migration
- Update Permalinks (Settings → Permalinks → Save)
- Check images, links, and forms
- Install an SEO plugin and submit your site to Google Search Console
Conclusion
Moving a WordPress site from localhost to a live server may sound technical, but using the right plugin makes the process simple and beginner-friendly. By following this guide, you can launch your WordPress website confidently without data loss or errors.
If you are planning to take your website live for the first time, this method is one of the fastest and most reliable ways to do it.